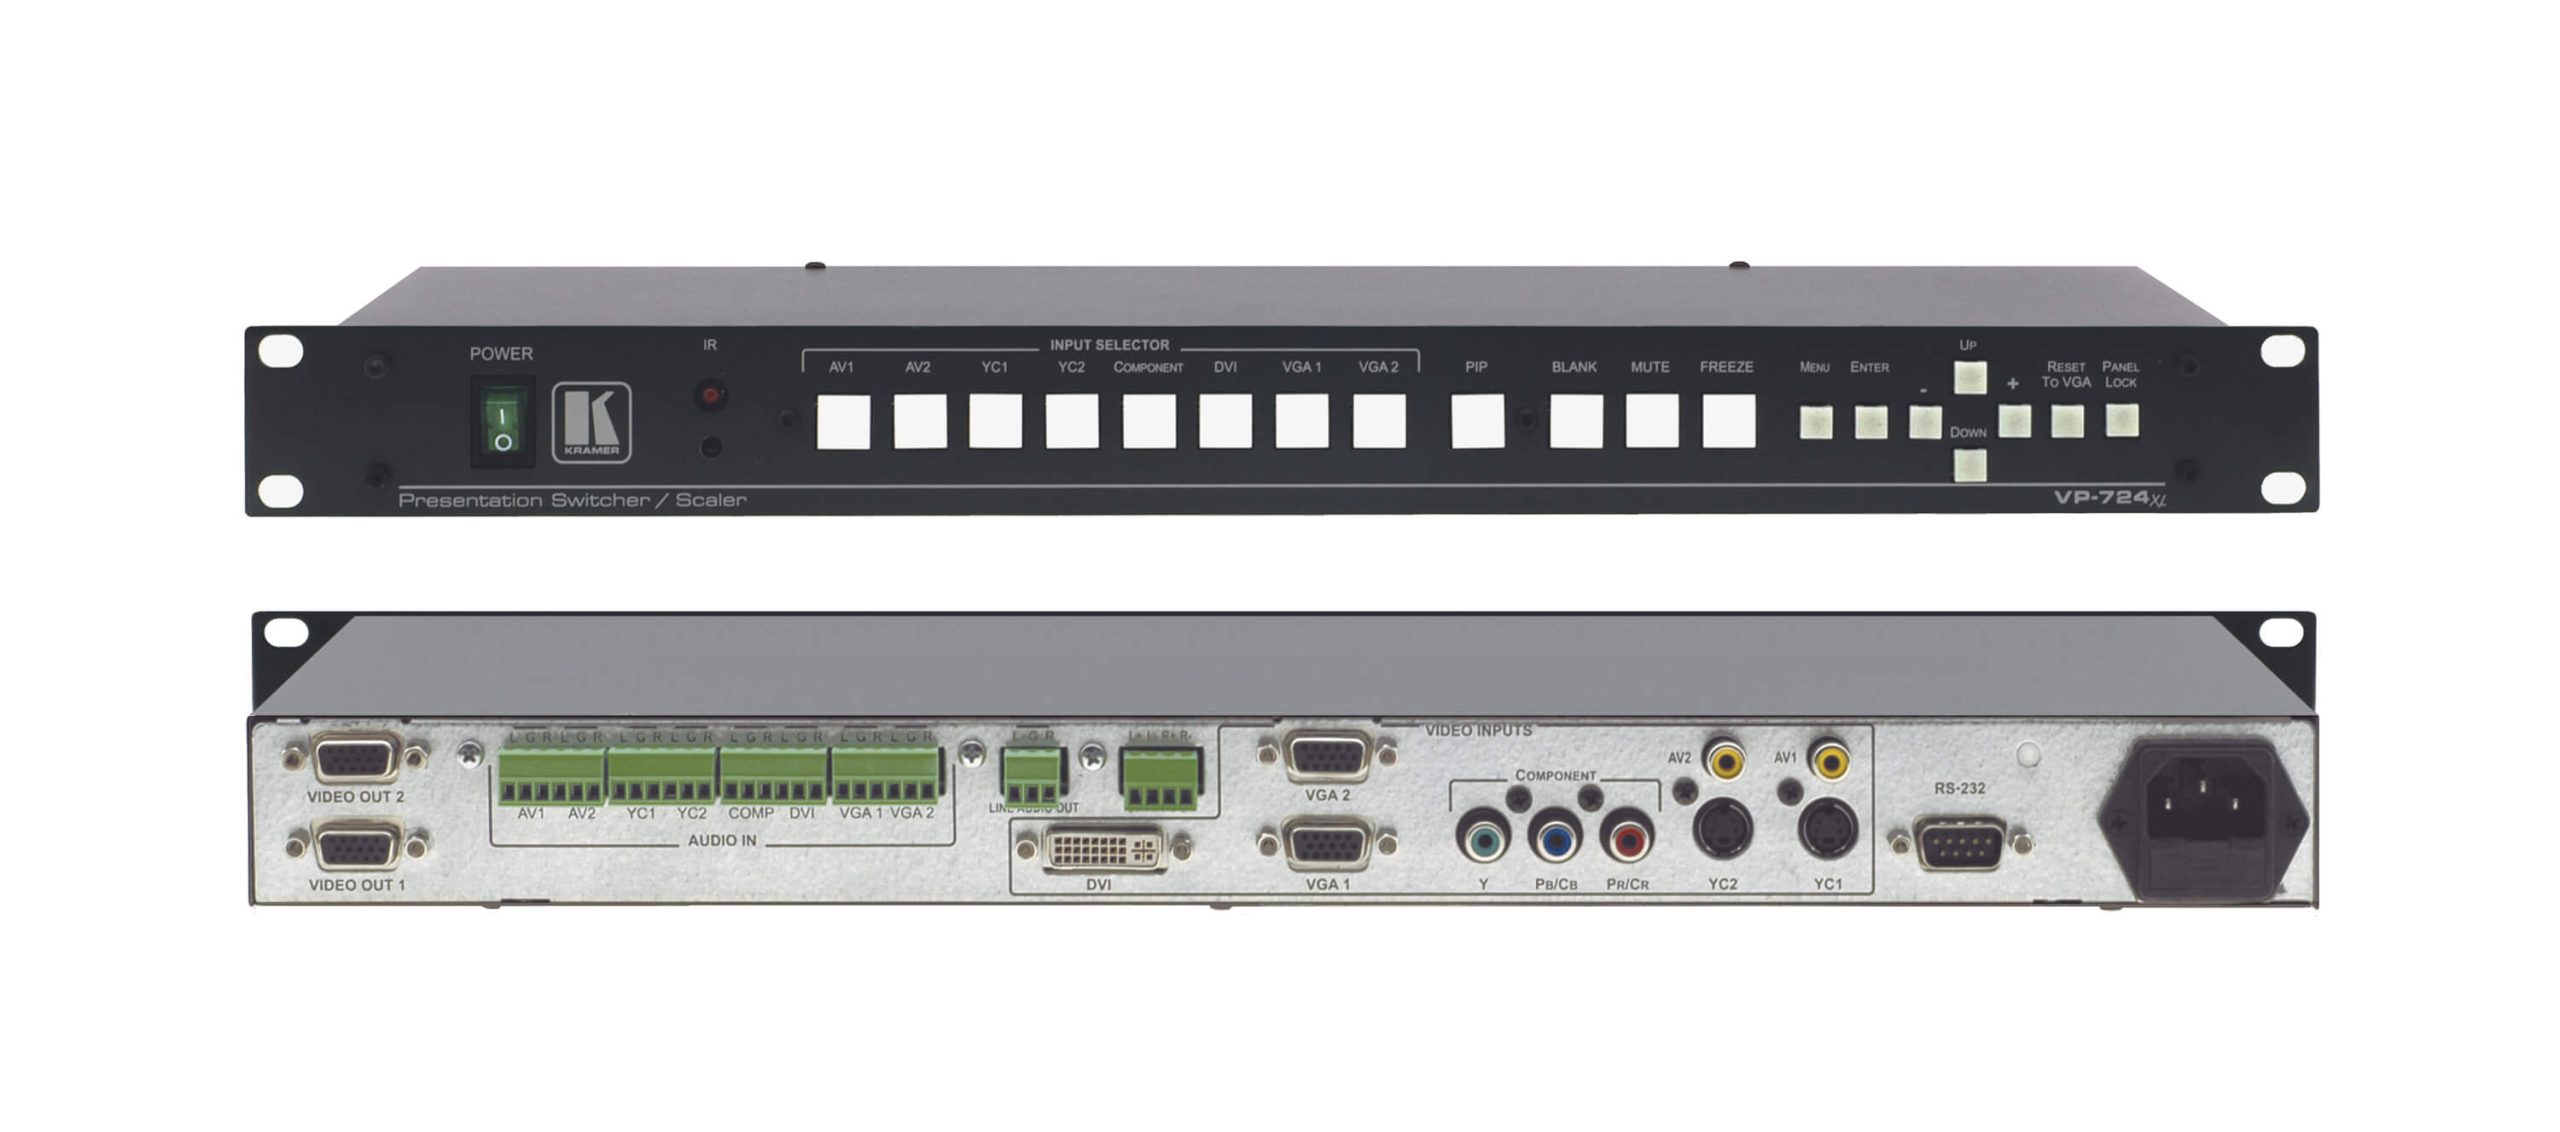
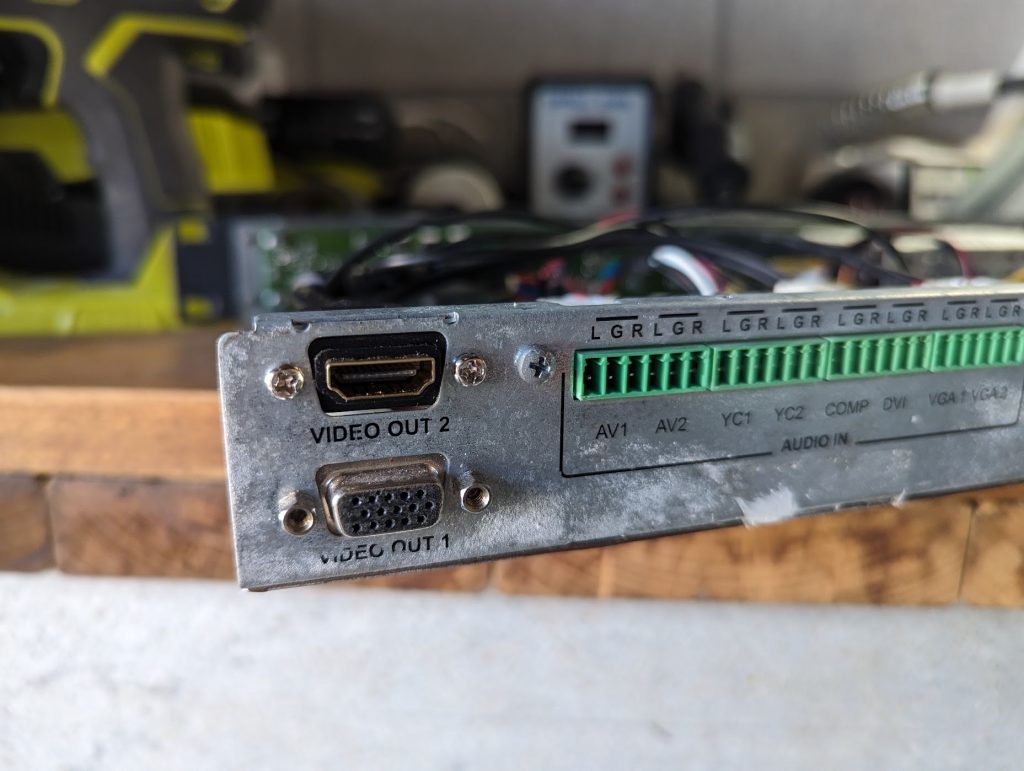
I picked up a used Kramer VP-724XL Video Switcher some time ago for ~$20. While I'm sure it's not the quality of modern scalers, it's faily versitile, featuring Composite, S-Video, Component, VGA and DVI inputs. It will scale all the inputs to a user specified resolution, but only out over VGA - that's what I'd like to fix.
While there is probably a way to intercept the digital signal from the scaler and convert it to DVI or HDMI, I'm going to do this the lazy way.
This blob is really for my own documentation so I don't forget, but maybe someone else might find it useful!
Parts
I'm provide links, as they will be out-of-date quickly.
-
VGA to HDMI Adaptor
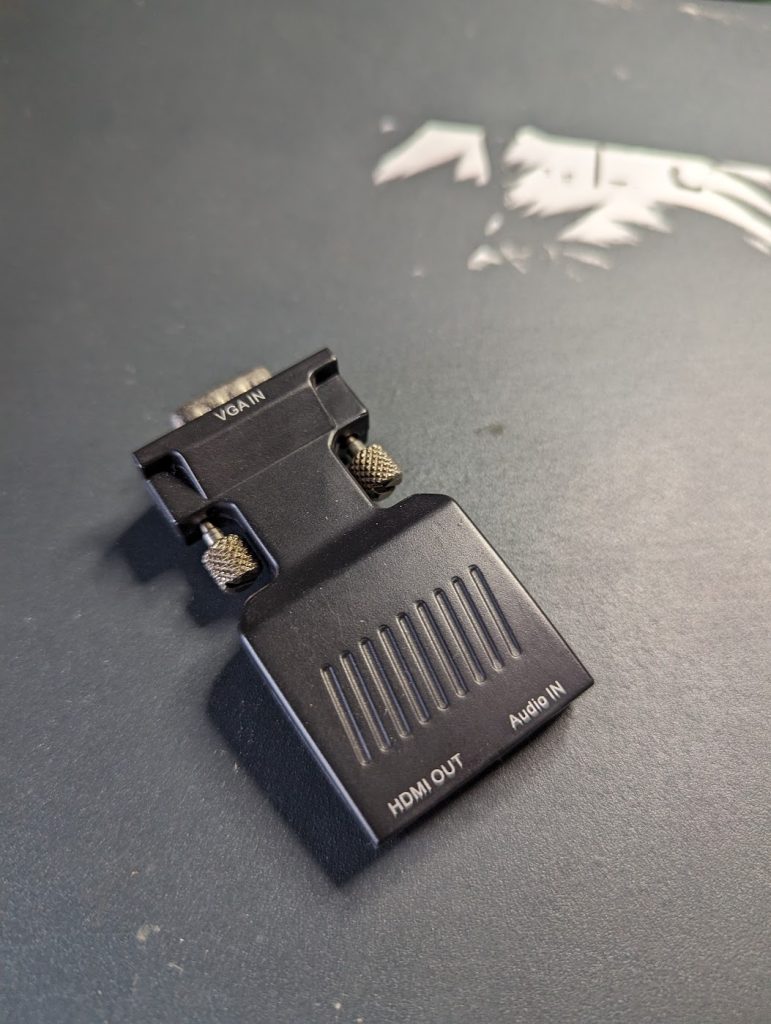
I'm using a cheap VGA to HDMI. These adaptors < $5 from AliExpress (just make sure the direction is the right way). The adaptors essientially consist of a high-speed ADC and will output whatever source resolution is provided. They won't do any scaling on their own. -
HDMI Panel Mount
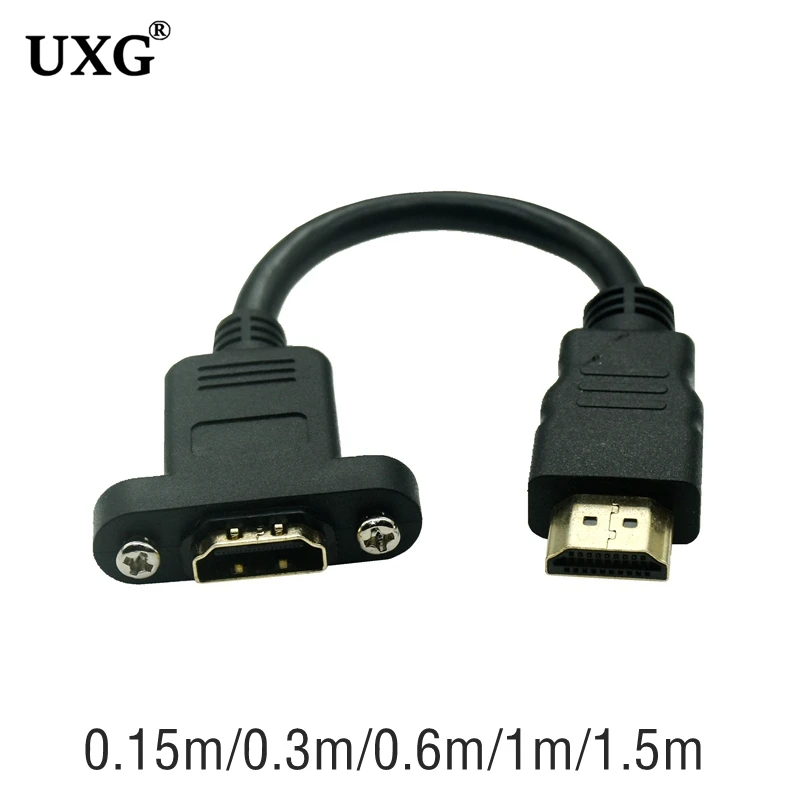
This is a low cost "15-cm-1m HDTV-compatibl-Extension Cable" - basically a 15cm Female HDMI with a panel mount, to a male HDMI cable. -
3.5mm Cable - I just used an old one and cut it half, otherwise the VGA adpaptor should include one
-
Micro-USB cable - one should come with the adaptor
Steps
-
Install the HDMI Adaptor in place of one of the VGA Outputs. It doesn't matter which one. Simply unscrew the existing VGA port, and screw the HDMI adaptor in it's place.
-
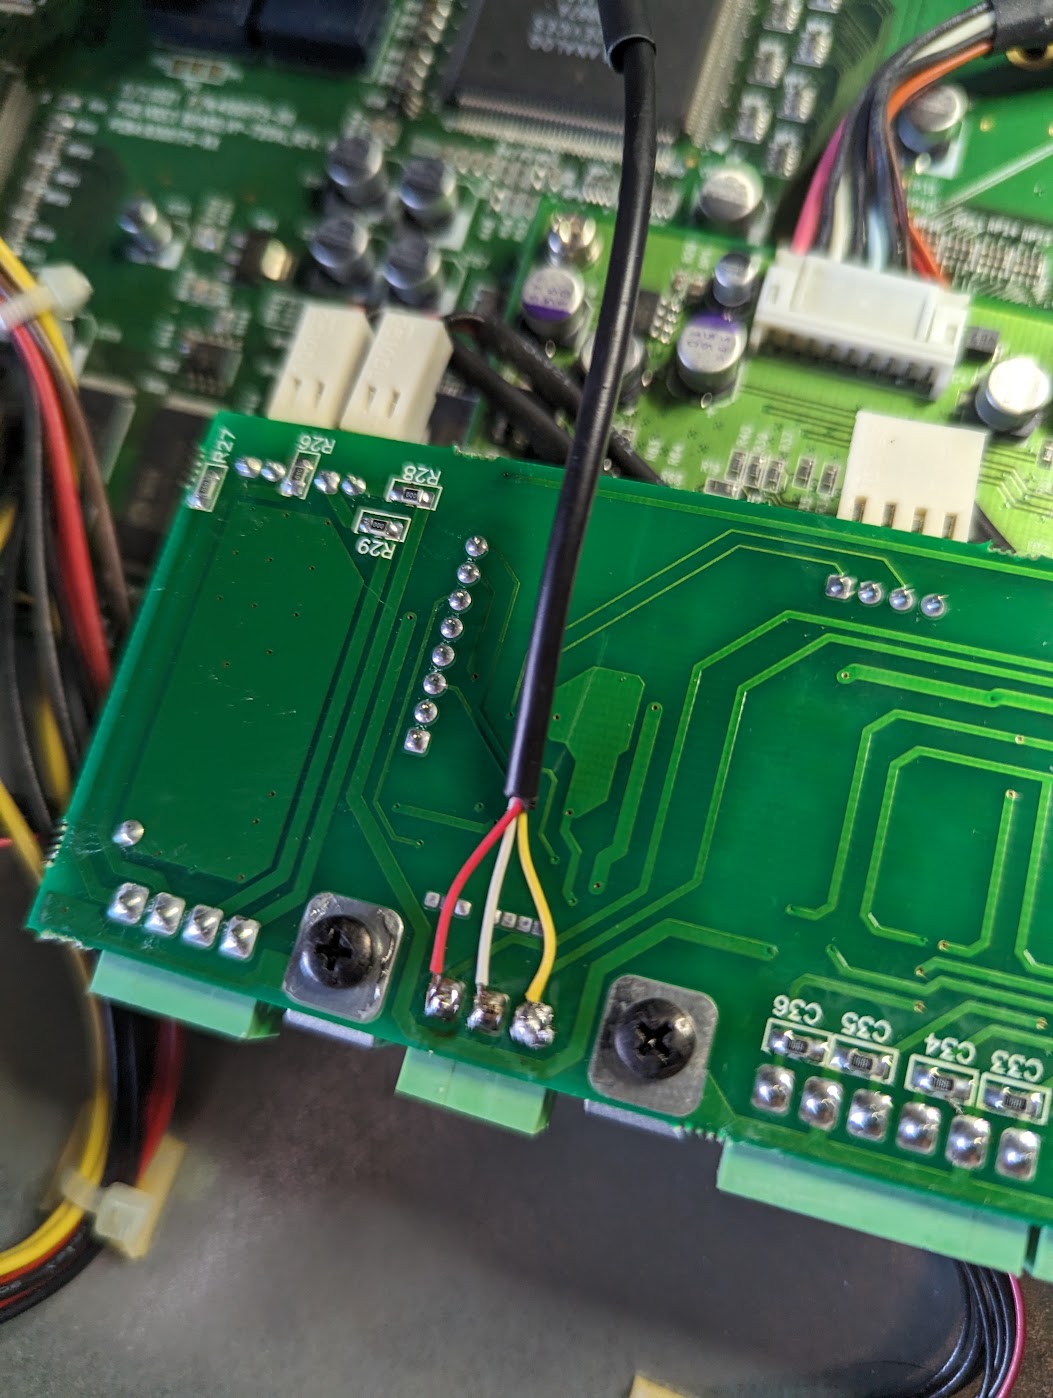
Unscrew the audio board, and solder the 3.5mm audio leads to the line-out pins on the audio board. Don't forget to double-check the pin out on the cable.

-
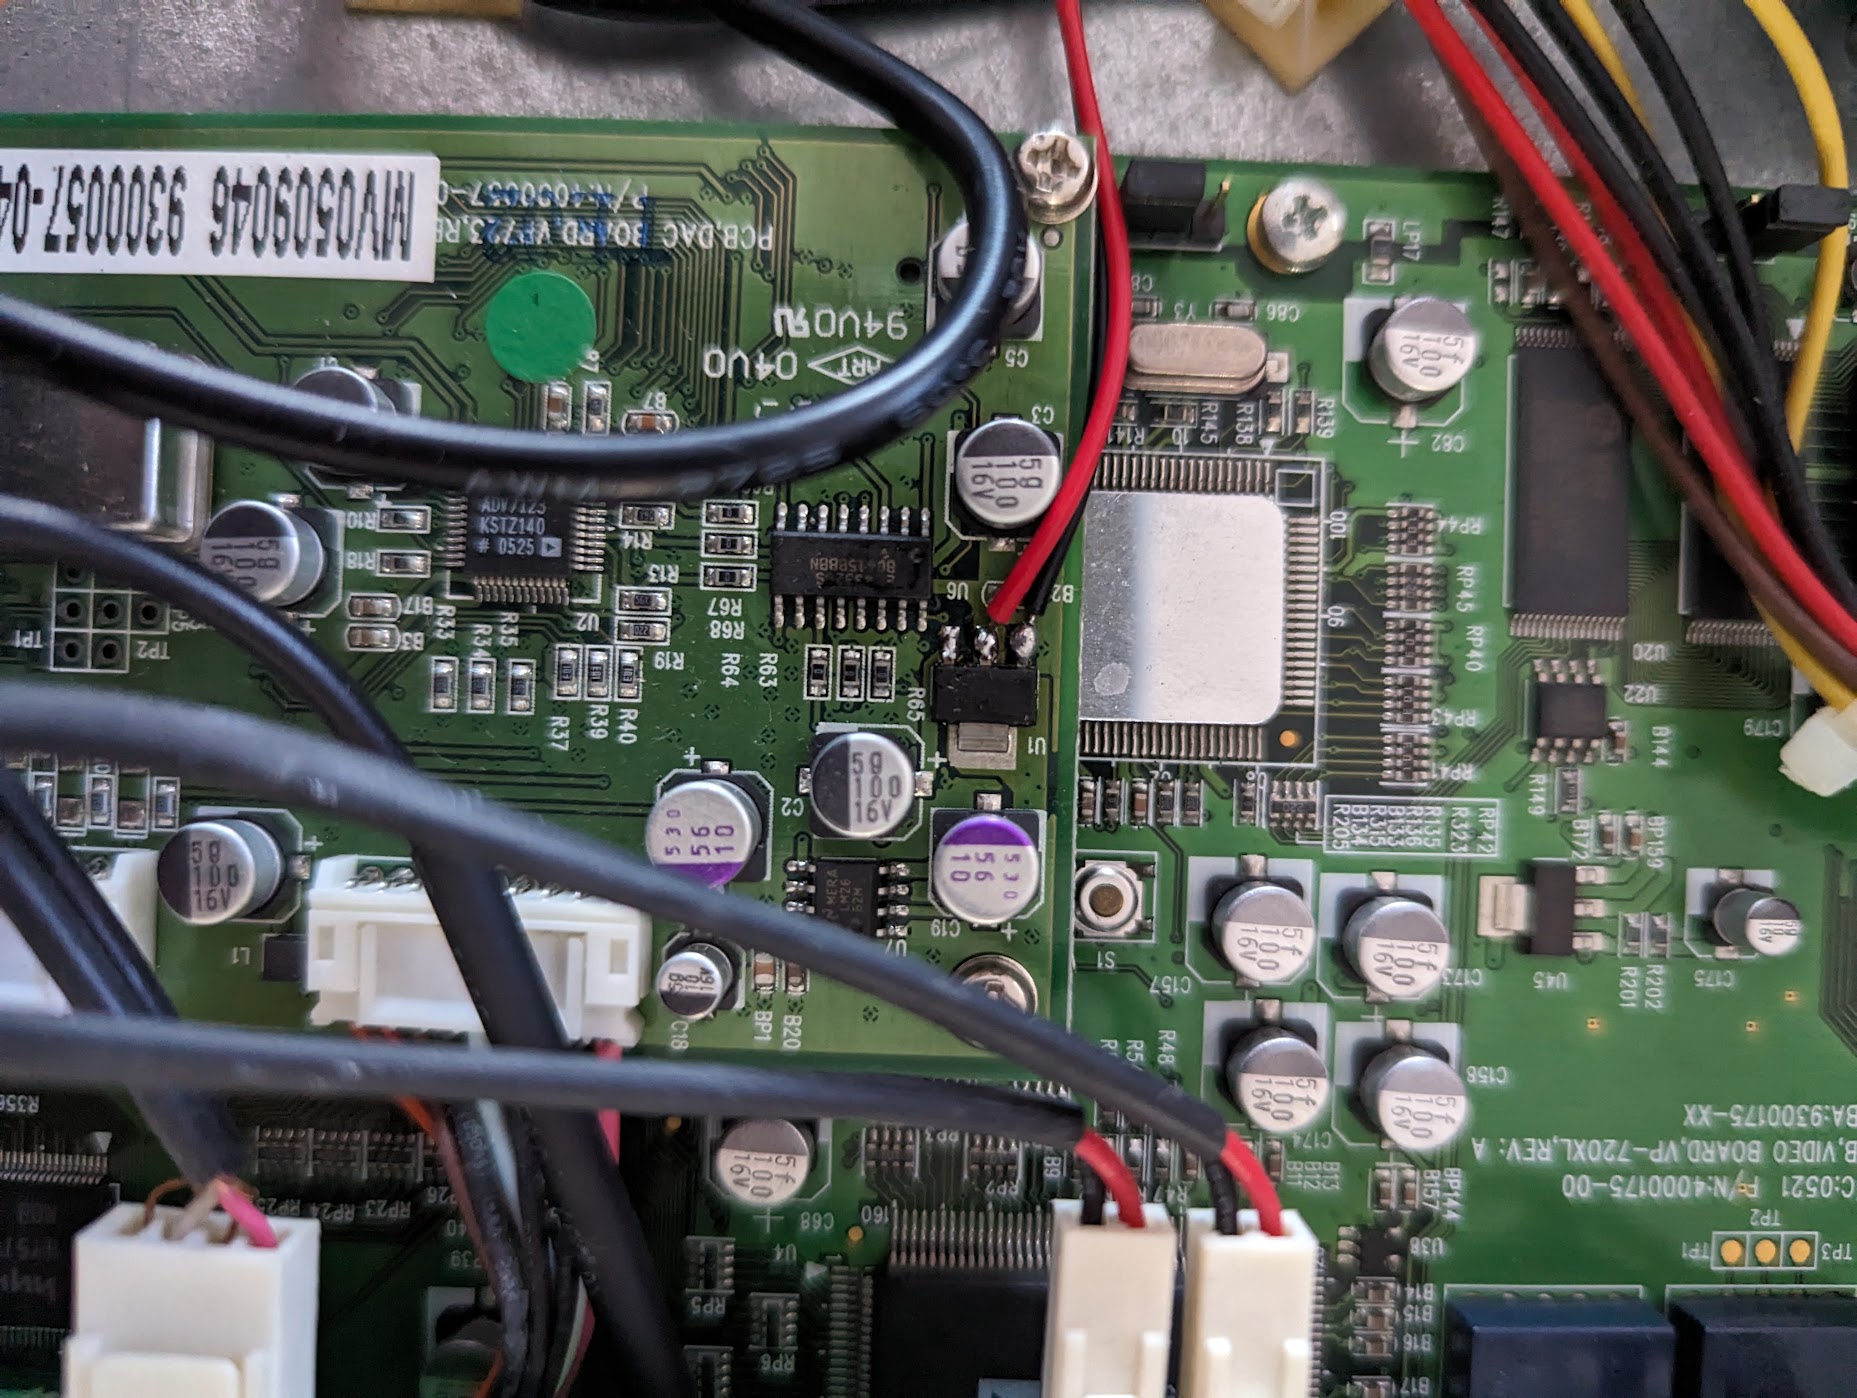
The power-supply seems to give 3.3v, ~7v, and 12v. I wasn't able to find a header with the appropriate voltages. There's a few regulators though that convert the 7v to 5v. On the DAC board, solder the USB cable power-leads to the

-
Connect to the original VGA lead, 3.5MM audio jack and micro-USB cable to the VGA to HDMI Adaptor. Connector the HDMI adaptor to the HDMI jac installed in step one.


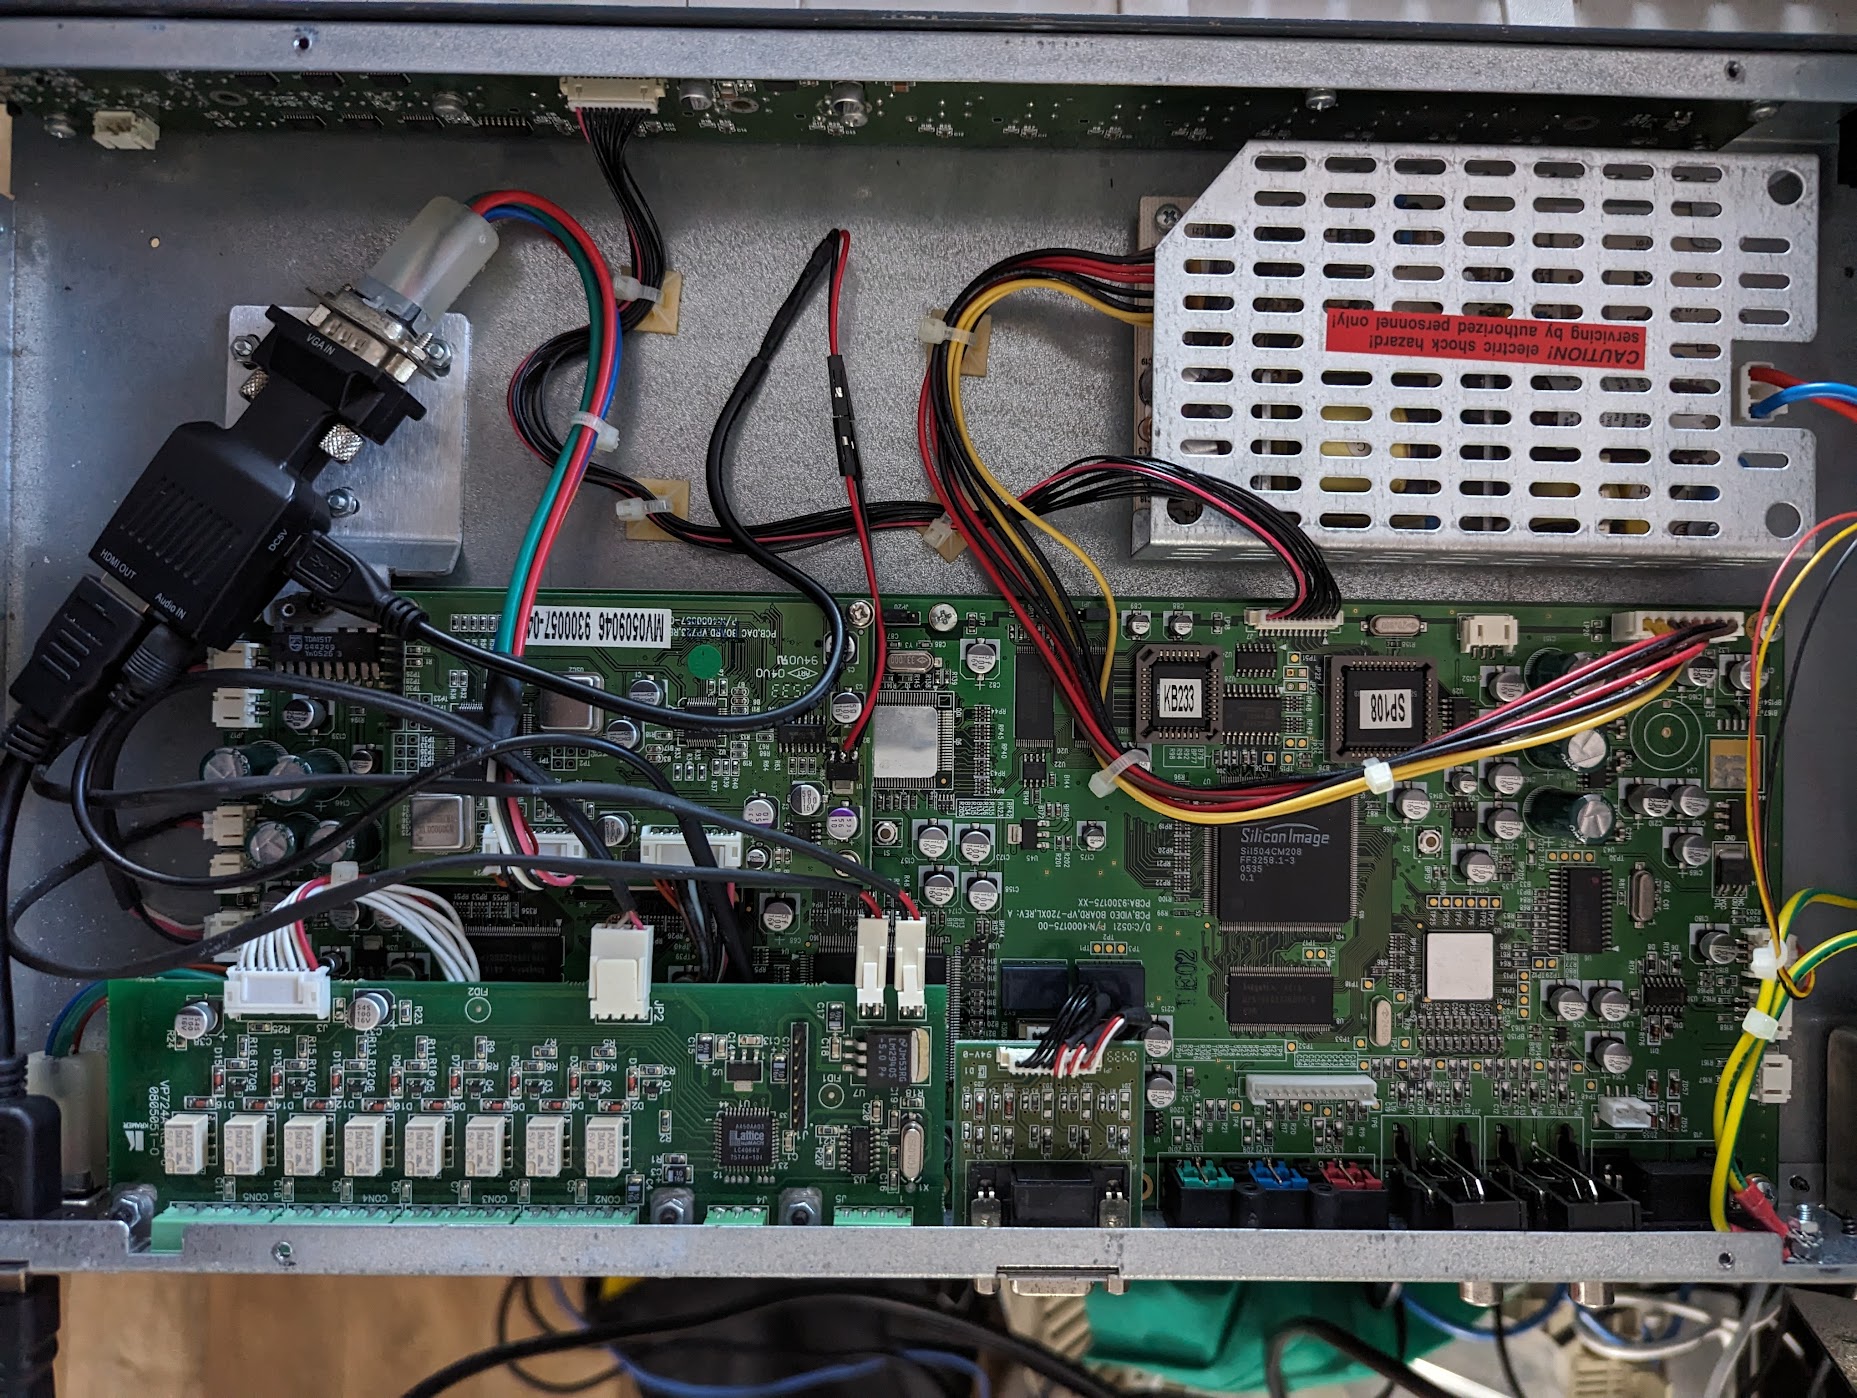
That's really it! I'll likely apply some double-sided tape or similar to secure the converter.
While I could have soldered directly to the adaptor, this configuration gives the option of swapping it out in the future if I so please.
What else?
I haven't really explored hacking this device too much. It seems to largely be some dedicated video ASICS combined with plenty of FPGA/CPLDs.
There is a full serial protocol that might be useful (especially if I expose it via Bluetooth).
All the Kramer support files available as of 2024-05-19 are included below. Most of these are relevant to the VP-719xl, VP-720xl, VP-724xl as well.
Be First to Comment