Skip to content

Category: Uncategorised

Adding HDMI to a Kramer VP-724XL Video Scaler

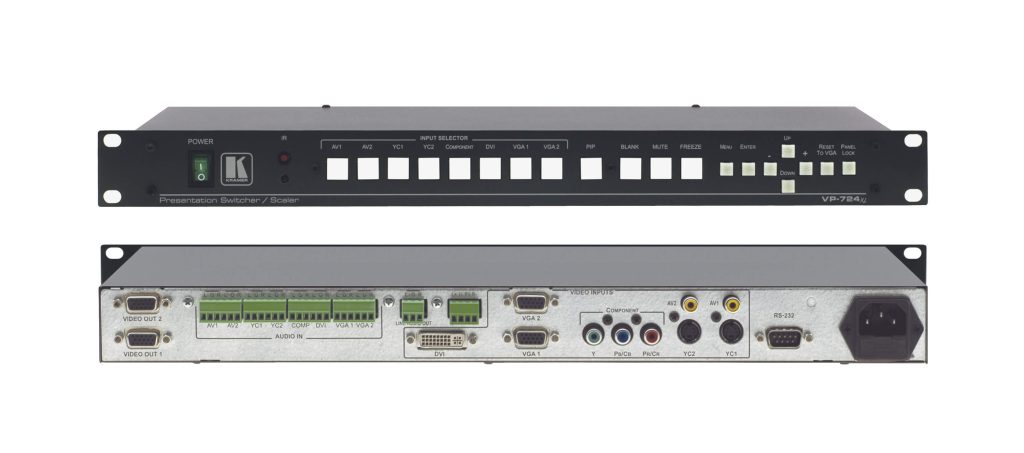
I picked up a used Kramer VP-724XL Video Switcher some time ago for ~$20. While I'm sure it's not the quality of modern scalers, it's faily versitile, featuring Composite, S-Video, Component, VGA and DVI inputs. It will scale all the inputs to a user specified resolution, but only out over VGA - that's what I'd like to fix.

Kramer VP724XL

While there is probably a way to intercept the digital signal from the scaler and convert it to DVI or HDMI, I'm going to do this the lazy way.

This blob is really for my own documentation so I don't forget, but maybe someone else might find it useful!

Parts

I'm provide links, as they will be out-of-date quickly.

  1. VGA to HDMI Adaptor
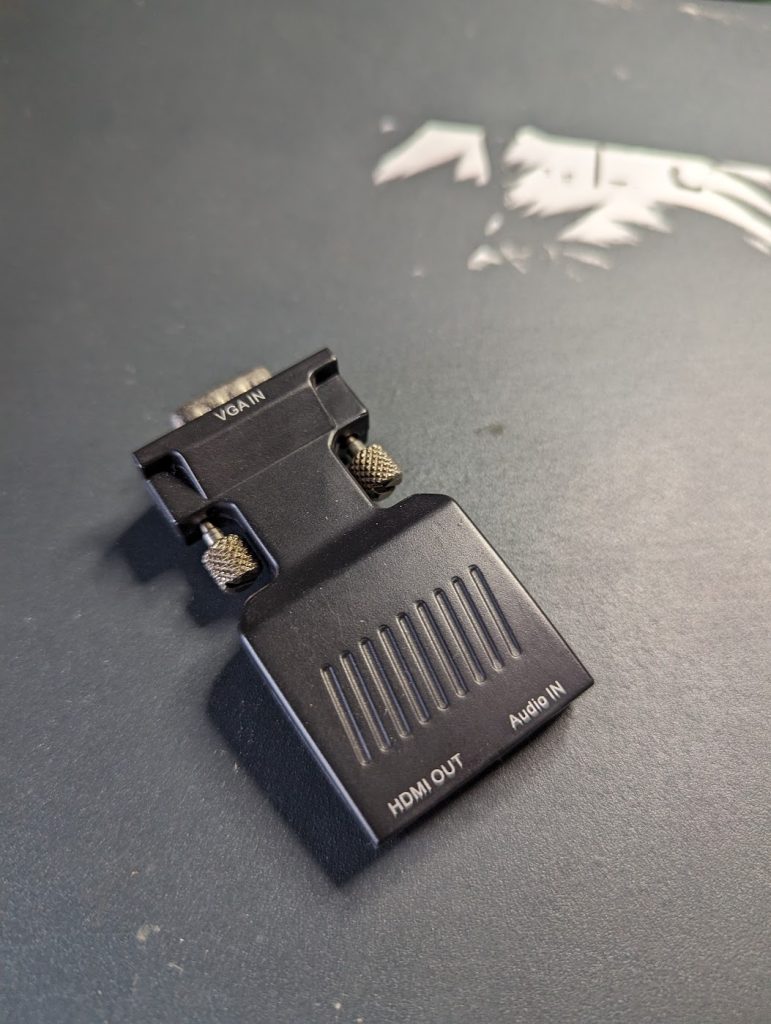
    Low-cost VGA to HDMI
    I'm using a cheap VGA to HDMI. These adaptors < $5 from AliExpress (just make sure the direction is the right way). The adaptors essientially consist of a high-speed ADC and will output whatever source resolution is provided. They won't do any scaling on their own.

  2. HDMI Panel Mount
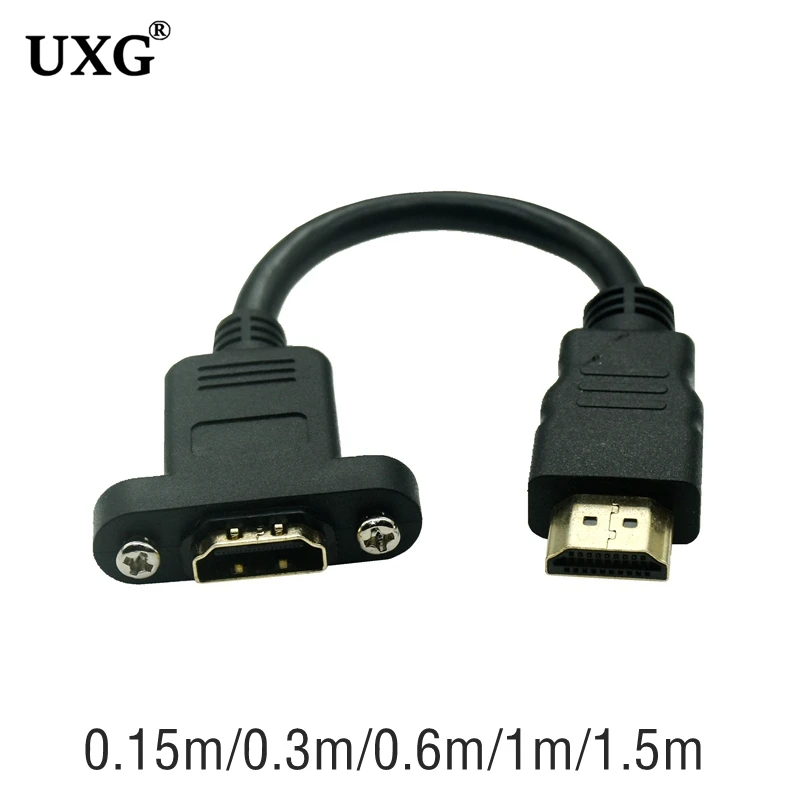
    15cm-1m HDTV-compatibl-Extension Cable Male To Female Gold Plated With Screw Panel Mount Extended Short Cable For HD TV LCD Lapt
    This is a low cost "15-cm-1m HDTV-compatibl-Extension Cable" - basically a 15cm Female HDMI with a panel mount, to a male HDMI cable.

  3. 3.5mm Cable - I just used an old one and cut it half, otherwise the VGA adpaptor should include one

  4. Micro-USB cable - one should come with the adaptor

Steps

  1. Install the HDMI Adaptor in place of one of the VGA Outputs. It doesn't matter which one. Simply unscrew the existing VGA port, and screw the HDMI adaptor in it's place.
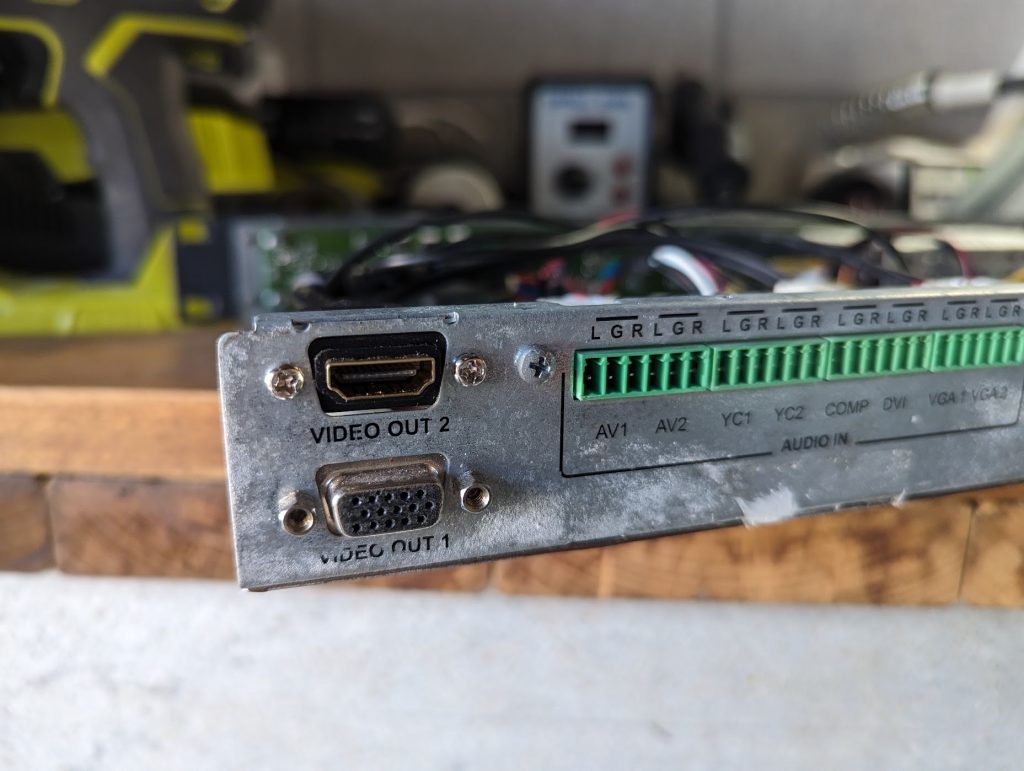
    HDMI Adaptor Installed

  2. Unscrew the audio board, and solder the 3.5mm audio leads to the line-out pins on the audio board. Don't forget to double-check the pin out on the cable.
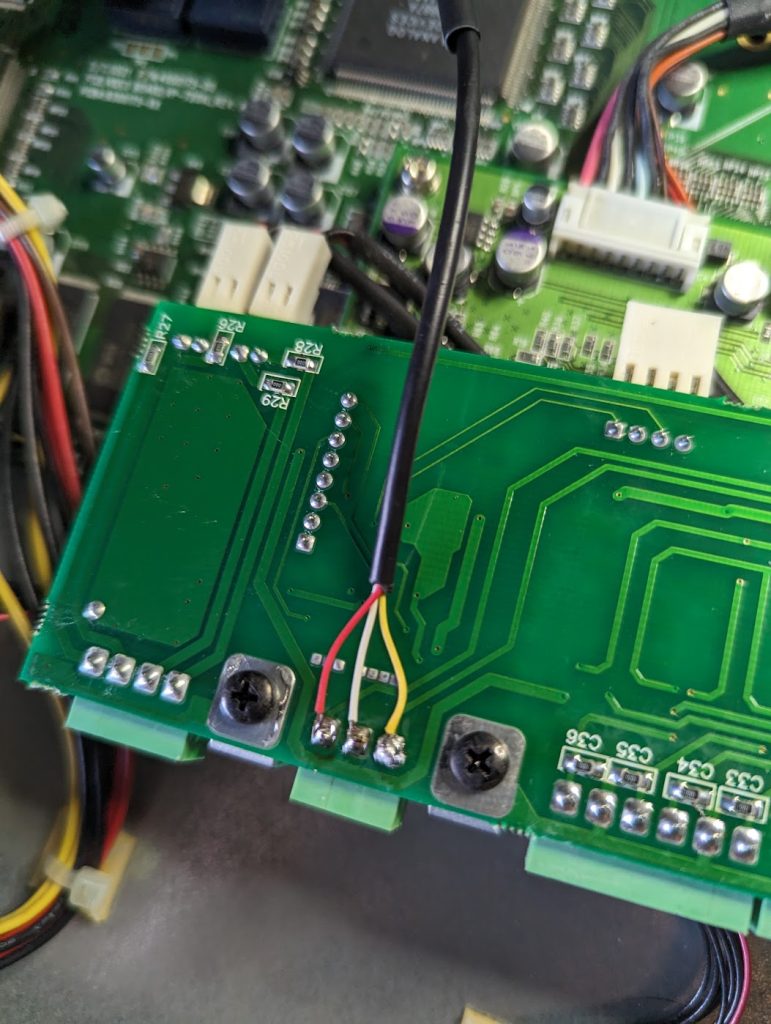
    3.5mm lead soldered to the audio output pins

  3. The power-supply seems to give 3.3v, ~7v, and 12v. I wasn't able to find a header with the appropriate voltages. There's a few regulators though that convert the 7v to 5v. On the DAC board, solder the USB cable power-leads to the Taping 5V from a regulator on the DAC Board
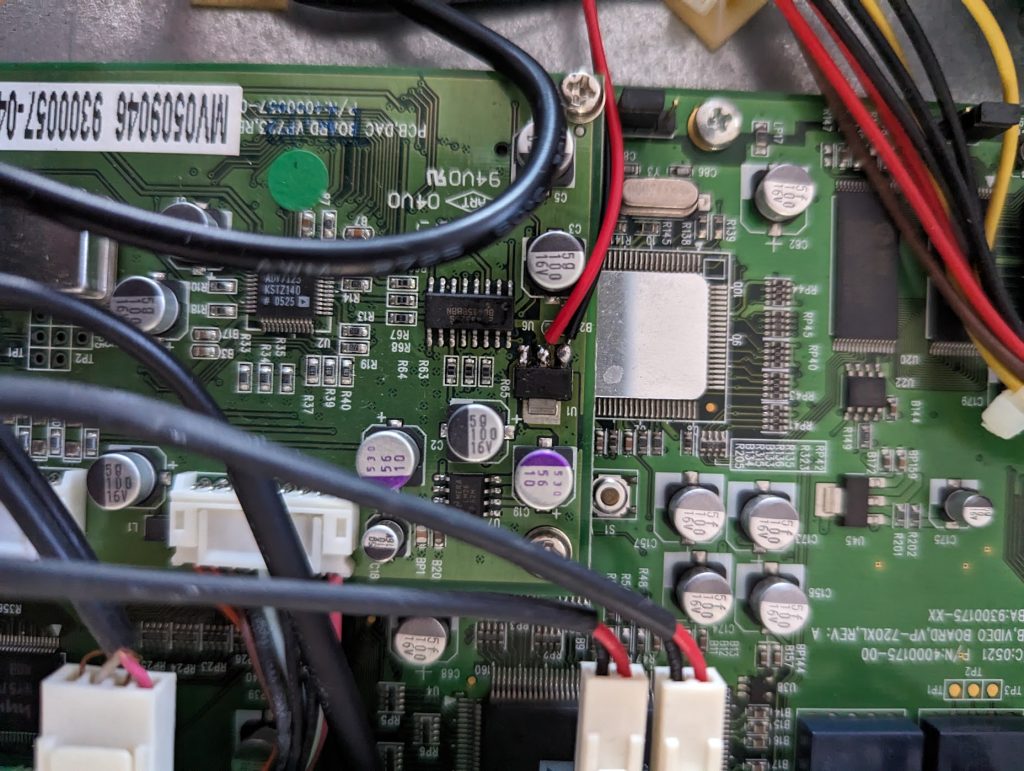
  4. Connect to the original VGA lead, 3.5MM audio jack and micro-USB cable to the VGA to HDMI Adaptor. Connector the HDMI adaptor to the HDMI jac installed in step one.
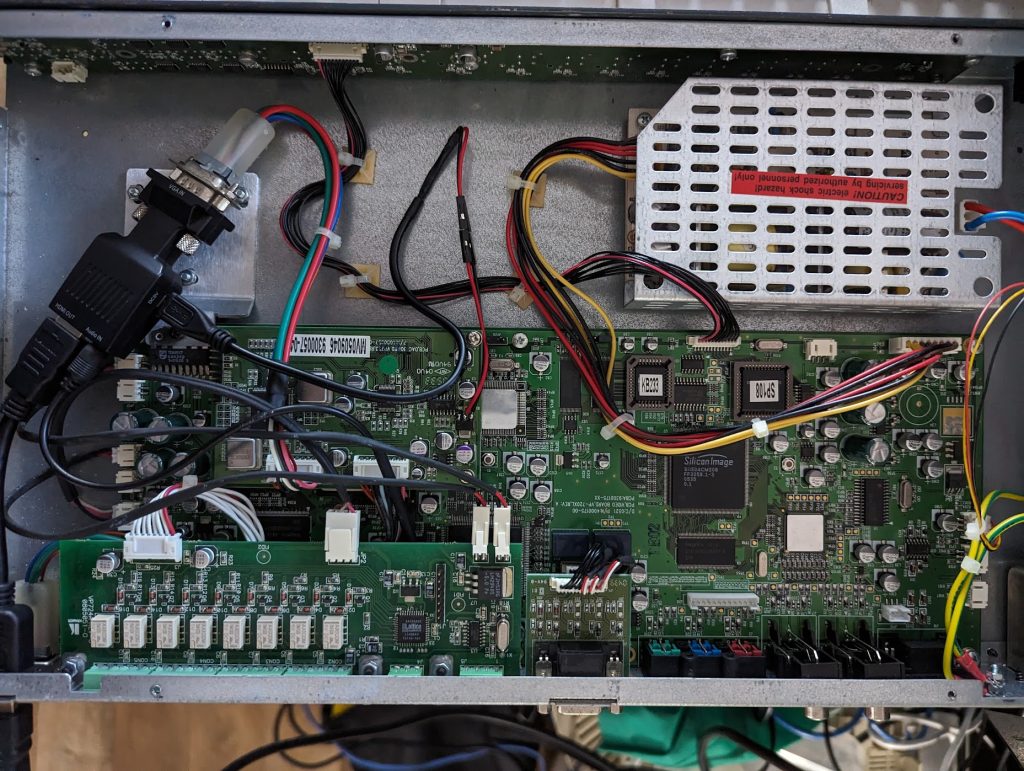
That's really it! I'll likely apply some double-sided tape or similar to secure the converter.

While I could have soldered directly to the adaptor, this configuration gives the option of swapping it out in the future if I so please.

What else?

I haven't really explored hacking this device too much. It seems to largely be some dedicated video ASICS combined with plenty of FPGA/CPLDs.
There is a full serial protocol that might be useful (especially if I expose it via Bluetooth).

All the Kramer support files available as of 2024-05-19 are included below. Most of these are relevant to the VP-719xl, VP-720xl, VP-724xl as well.

Download Kramer VP724XL Files

Leave a Comment

Mounting OnTrack Volumes in Windows

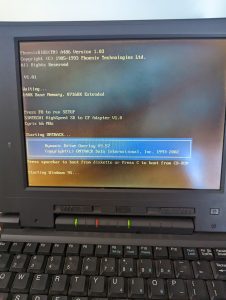
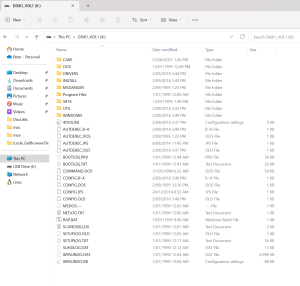
I use an old dynamic drive overlay tool called OnTrack to get around a 504MB drive-size BIOS limit on older machines. It works well enough for Dos and early versions of Windows. However, if you go try to mount the volume on another machine, it will appear to have no valid partitions!

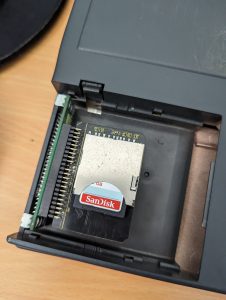
SD Adaptor inside a laptop

OnTrack appears to put the original MBR at around sector 63, with the partition boot record (PBR) offset at sector 63 from there. This is quite different to a regular MS-DOS Drive layout - and this is caused by the customer loader OnTrack users to replace the BIOS routines.

On-Track starting up

To mount these volumes on Windows, we need a way to mount at an offset of 126 sectors (or 126 * 512 Sector Size = 64,512 bytes).

Fortunately, there is a utility that can do this: ImDisk.

ImDisk is an open-source virtual disk driver with many features, including RAM Disk and other support.

To mount my OnTrack volume using ImDisk, I need to know the physical disk # in Windows.

  1. Open an admin command prompt
  2. Run diskpart and view disk to get a list of disks. Note the 8GB disk is my SD Card, and it is Disk 2

    DISKPART> list disk
    
    Disk ###  Status         Size     Free     Dyn  Gpt
    --------  -------------  -------  -------  ---  ---
    Disk 0    Online          476 GB  1024 KB        *
    Disk 1    Online          476 GB      0 B        *
    Disk 2    Online         7580 MB    10 MB
  3. Exit diskpart.

Mounting the volume

  1. Open an admin command prompt
  2. Run the following command:
    imdisk -a -f \\.\physicaldrive2 -b 64512 -o ro -m x:

The volume is now mounted as X: Drive.

If it's not, double-double check your drive path and byte offset.

What is this doing?

  • -a - tells imdisk to attach a virtual disk
  • -f - specifies the file. In this case, we're using the Windows NT Physical drive path.
  • \\.physicaldrive2 - note this correseponds with disk 2 from diskpart.
  • -b 64512 tells it use use an offset, in this case our sector offset (63 + 63 * 512) for the start of the first partition.
  • -o ro - option of mounting as readonly. If you're unsure you've got the right drive and/or offset, make sure this option is set.
  • -m x: - mounts the drive as X:

Making it writeable

You'll need to unmount the disk (imdisk -D -m X:) and re-run the above command, without -o -ro.

Leave a Comment

Gopher Clients Archive

I've started a Github repository to archive old Gopher Clients for various clients. As old websites are "upgraded" and taken offline, or old FTP servers get switched off, it's becoming more difficult to find these old clients.

Go check it out:
https://github.com/ObsoleteMadness/gopherclients

Pull requests which add more clients, archives of old FTP sites or descriptions and screenshots are very welcome.

I have some leave coming up and hope to revisit my old C# Gopher Server project. Plans include:

  • Port to .NET 6.0
  • Docker support
  • Better configuration and DI
Leave a Comment